ATTiny85 Debugging Record
Bootloader
P:\Arduino\hardware\tools\avr/bin/avrdude -C "P:\Arduino\hardware\tools\avr/etc/avrdude.conf" -v -pattiny85 -carduino -PCOM4 -b119200 -Uflash:w:D:\t85_default.hex:i -U lfuse:w:0xE1:m -U hfuse:w:0xDD:m -U efuse:w:0xFE:m
Using Arduino as ISP Programmer
| Attiny | Arduino |
|---|---|
| Pin 1 (PB5) | D10 |
| Pin 4 (GND) | GND |
| Pin 5 (PB0) | D11 |
| Pin 6 (PB1) | D12 |
| Pin 7 (PB2) | D13 |
| Pin 8 (VCC) | 5V |
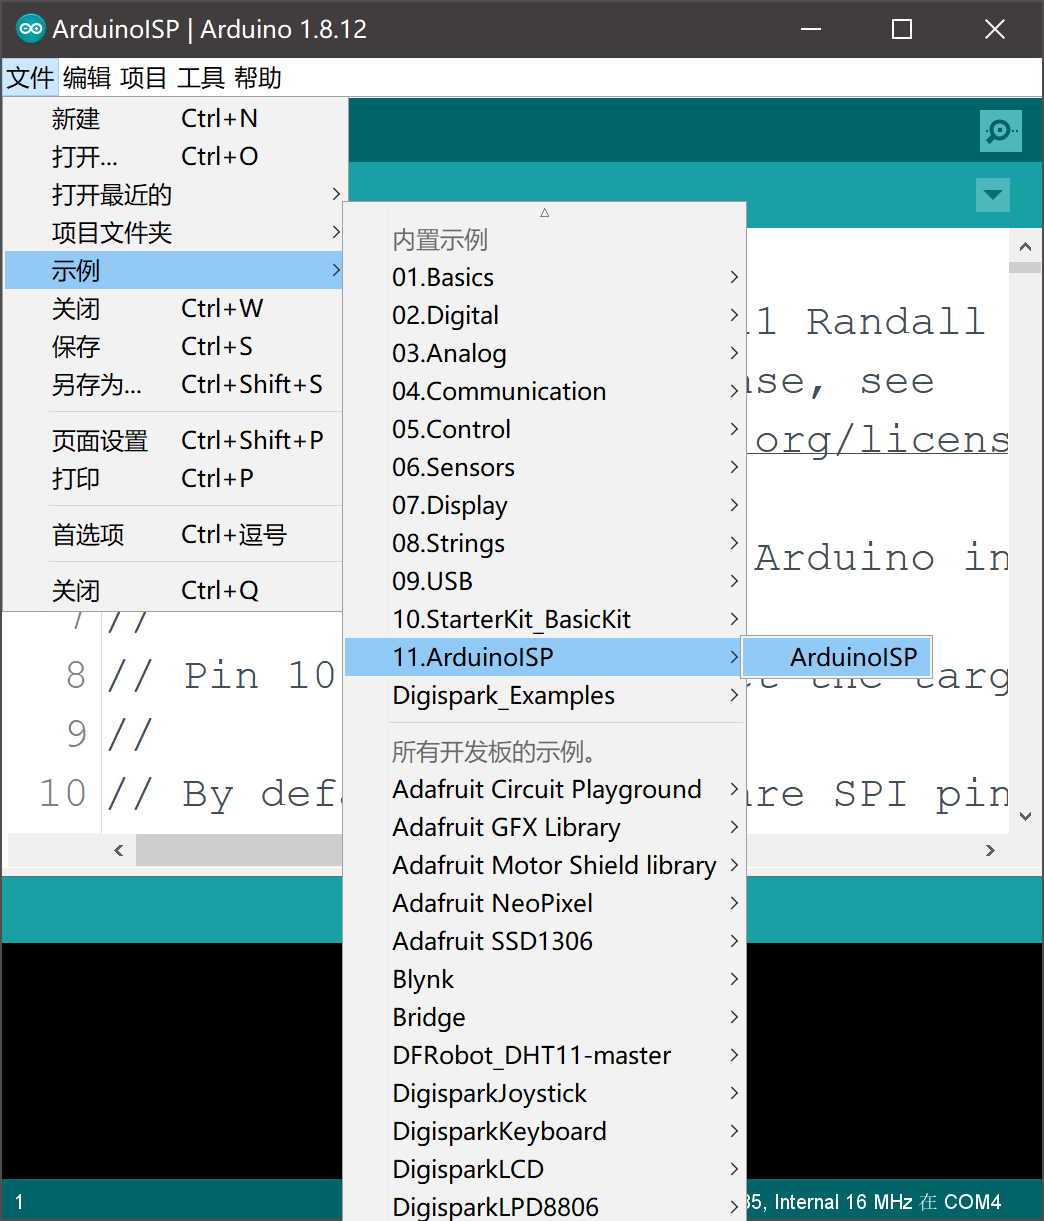
First, burn the ISP program to the Arduino:

Open the IDE's preferences and add the following URL to the Additional Boards Manager URLs:
https://raw.githubusercontent.com/damellis/attiny/ide-1.6.x-boards-manager/package_damellis_attiny_index.json
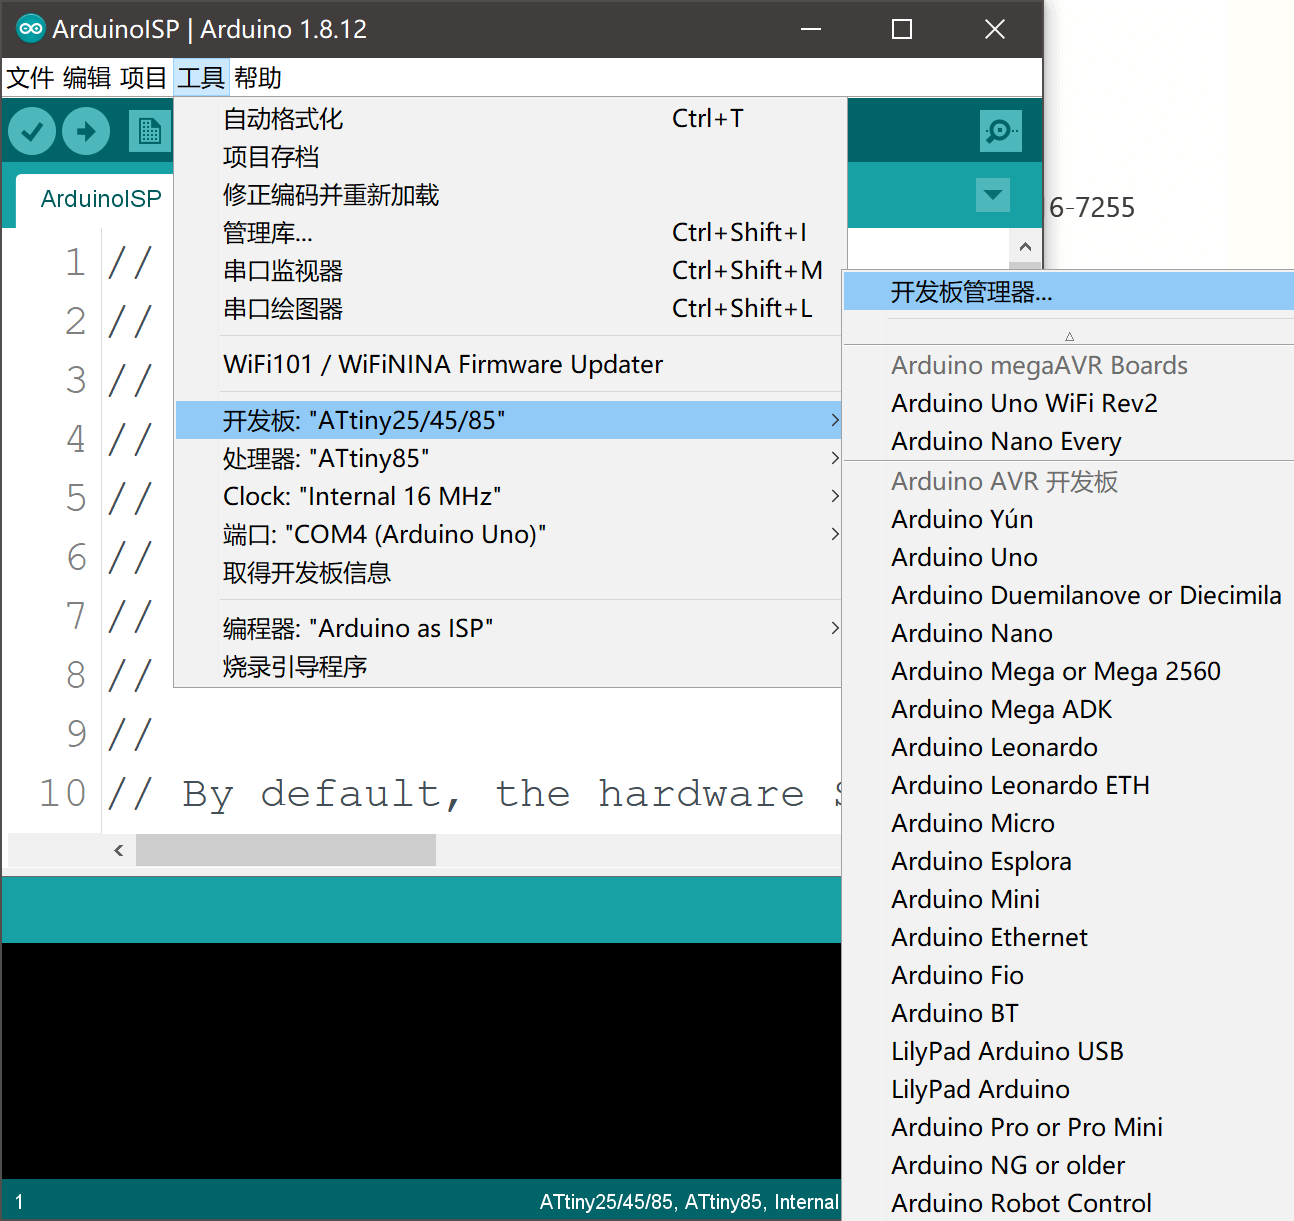
Open the Boards Manager:

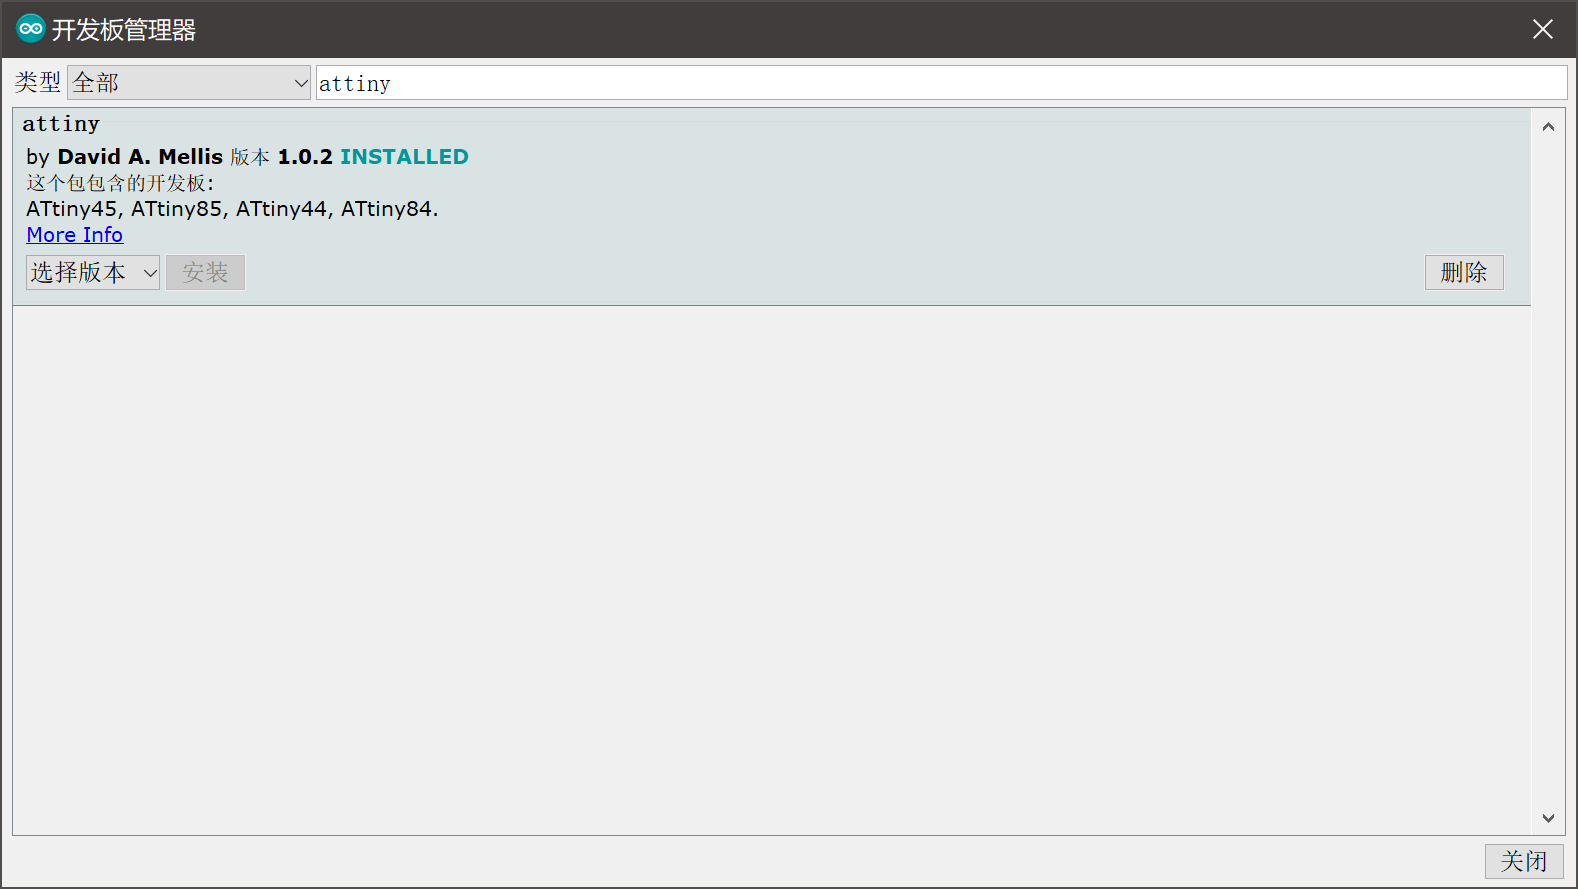
Search for and install the package (you might need a proxy):

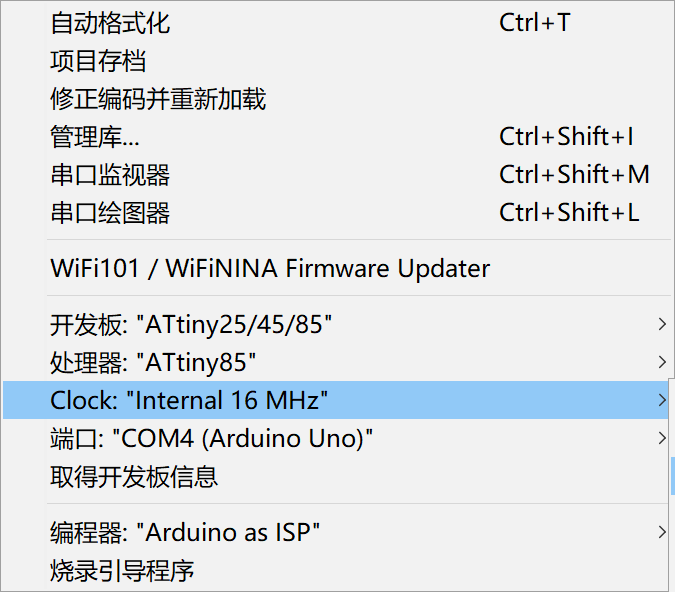
When burning the bootloader, make sure to select the correct chip model, clock speed (Internal 16 MHz), the port where Arduino is connected, and choose "Arduino as ISP" as the programmer:

Conclusion
References and Acknowledgments
- Homemade Tutorial for Building a Digispark Arduino Minimal System Based on ATTiny85 (Part 1)
- Homemade Tutorial for Building a Digispark Arduino Minimal System Based on ATTiny85 (Part 2)
- Exploring the Digispark USB Development Board (Part 1): Getting to Know This Compact, Affordable, and Versatile Arduino Compatible Board
- Connecting and Programming Your Digispark
- Programming the Attiny85 Micronucleus Bootloader
- Creating a Mini Game Console with ATtiny85
- Insights into DigiSpark ATtiny85: AVR ISP Programming and Bootloader Details
- Quick Reference: Frequently Requested Information
Original: https://wiki-power.com/ This post is protected by CC BY-NC-SA 4.0 agreement, should be reproduced with attribution.
This post is translated using ChatGPT, please feedback if any omissions.