HAL Library Development Notes - External Interrupt
In the previous article, we mentioned that using polling to eliminate button bouncing and detect input may consume excessive system resources and cause the system to freeze, or it may miss the detection. That's why we need to use interrupts.
Basic Principles
Polling vs Interrupt
What are polling and interrupt? Let's take the example of ordering takeout. Polling is like going to the door every minute to check if the delivery person has arrived. During this time, I can't do anything else but wait for the delivery. However, if the delivery person arrives when I happen to leave the door, I will miss the delivery. On the other hand, an interrupt is like receiving a phone call when the delivery person arrives. I can put down what I'm doing and go get the delivery. This way, I can focus on my work and not worry about missing the delivery.
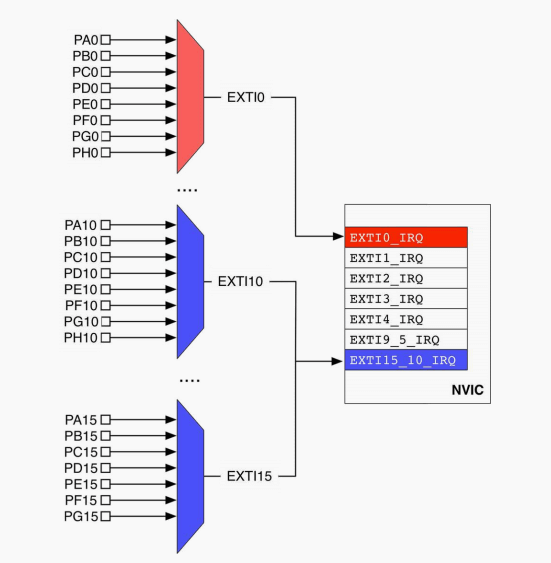
External Interrupt
Interrupts can be classified into external (Interrupt) and internal (Exception) interrupts. External interrupts are triggered by external peripherals to interrupt the MCU, while internal interrupts are triggered by internal software programs to interrupt the MCU.
NVIC
NVIC stands for Nested Vectored Interrupt Controller. It has three main parameters: interrupt enable, preemption priority, and response priority. (The lower the priority value, the higher the priority.)
Interrupt Enable: This refers to whether the interrupt is enabled. If the interrupt is enabled, when the interrupt trigger condition is met, the program will jump to the interrupt service routine. Otherwise, the interrupt service routine will be ignored, and the main program will continue to run.
Preemption Priority: It is used to determine whether one interrupt can preempt another interrupt's service routine and run first. For example, if condition A triggers interrupt A and the service routine of interrupt A is already running, and at this time condition B triggers interrupt B. If the preemption priority of interrupt B is higher than that of interrupt A, the service routine of interrupt A will be interrupted, and the service routine of interrupt B will be executed first. After that, the execution of interrupt A will continue. This is also known as interrupt nesting. If the preemption priority of interrupt B is not higher than that of interrupt A, interrupt A will be executed first, and then interrupt B will be executed.
Response Priority: If several interrupts with the same preemption priority are triggered at the same time, the interrupt with the higher response priority will be executed first.
To determine the priority of interrupts, the preemption priority is compared first. If the preemption priorities are the same, the interrupt with the higher response priority will have a higher priority. If both priorities are the same, the interrupt vector table is used to determine the priority.
Interrupt Callback Function Reference
After configuring the GPIO interrupt and NVIC priority, you can implement the functionality by rewriting the interrupt callback function at the end of the stm32f4xx_it.c file.
External Interrupt Button Control LED
Before proceeding to the next experiment, you need to configure various parameters such as serial port download and clock in CubeMX. Please refer to the article HAL Library Development Notes - Environment Configuration for specific steps.
Configuring Interrupts in CubeMX
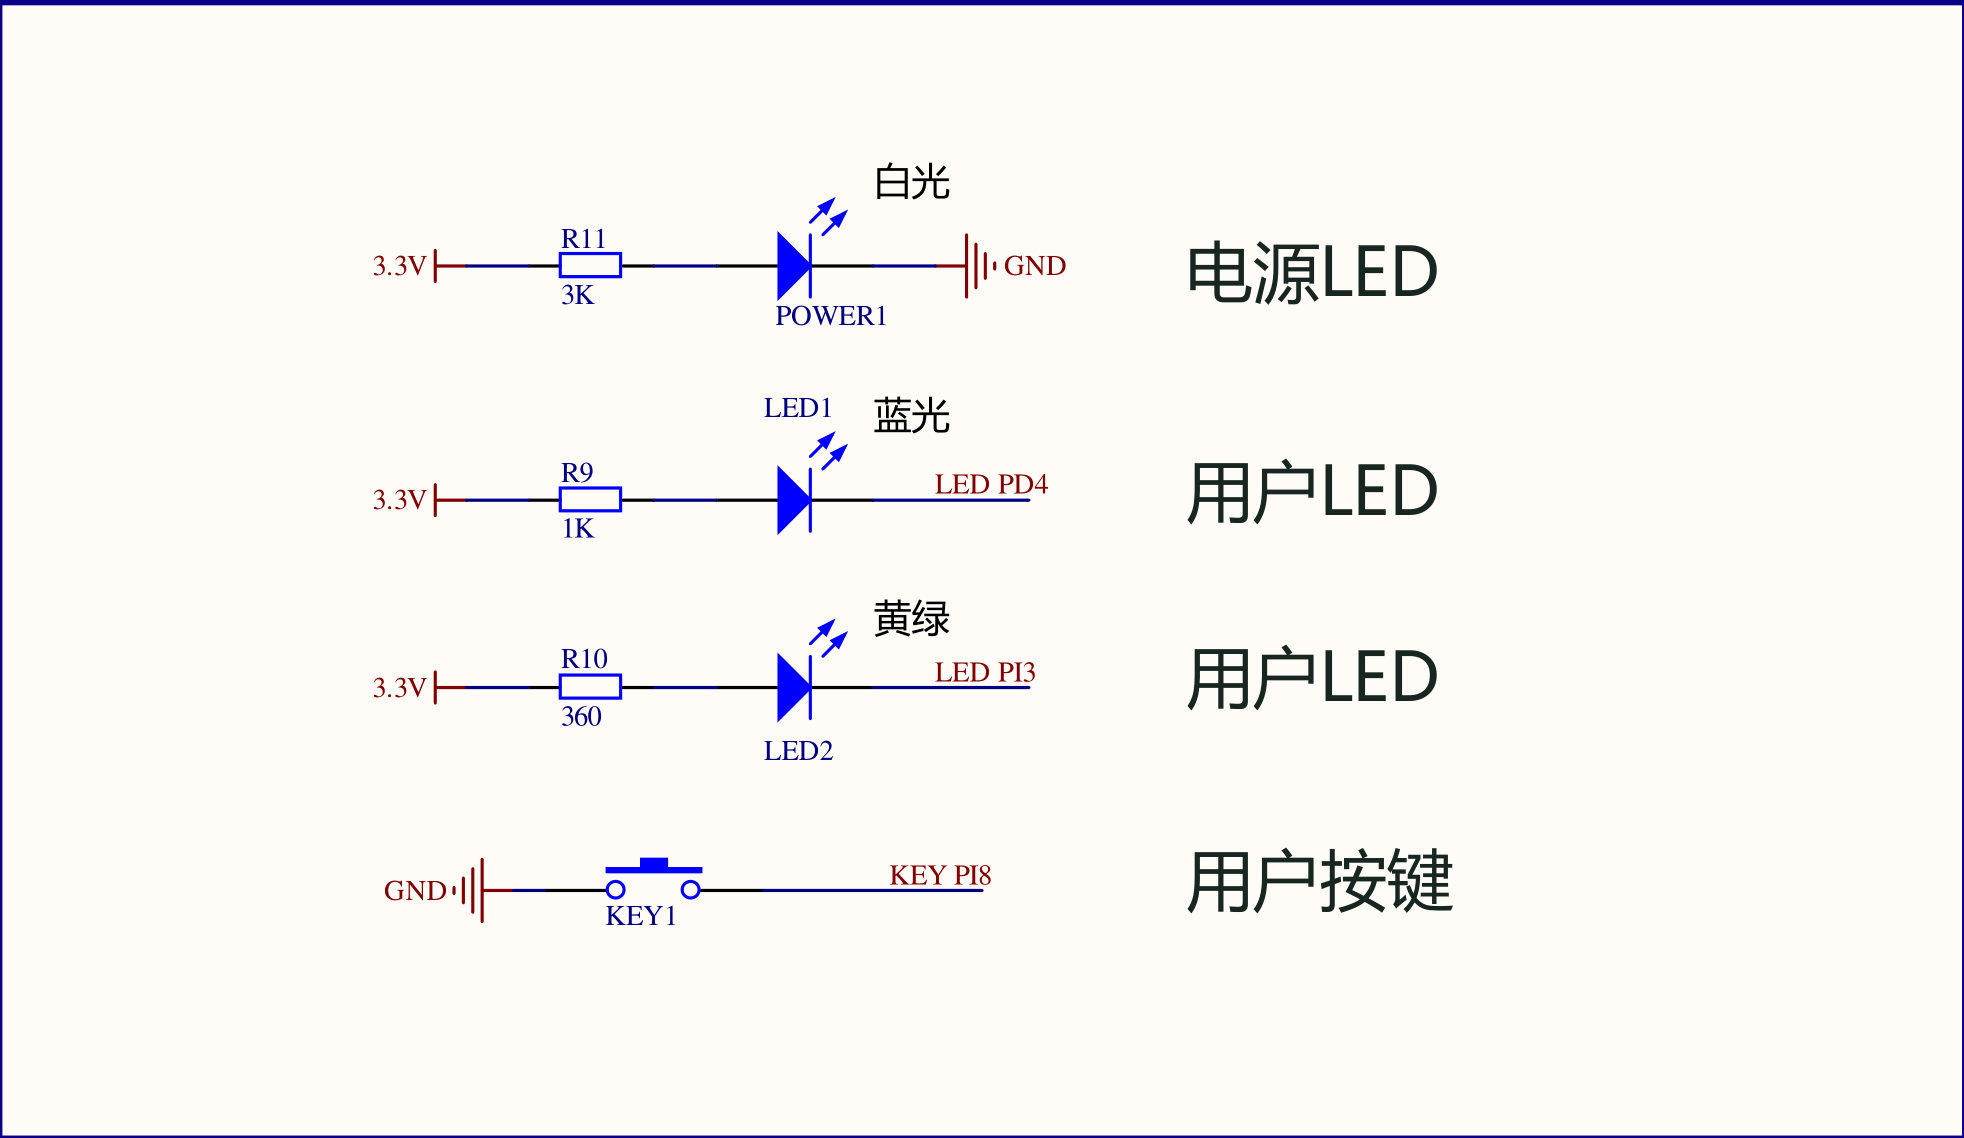
As shown in the figure, the LED is still configured as an output using the method mentioned in the previous article. Since the button is triggered by a low level, which means it generates a falling edge at the moment of pressing, the pin should be configured as an interrupt triggered by a falling edge.
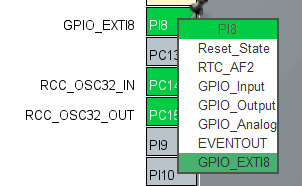
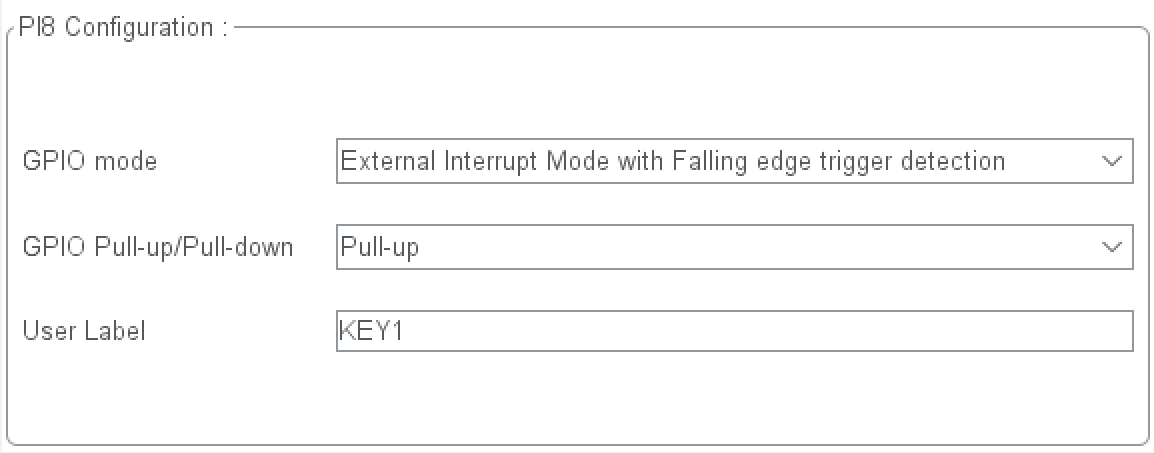
On my board, I configured PI8 as GPIO_EXTI8 mode (external interrupt, attached to interrupt line 8), and configured it as a falling edge trigger. According to the schematic, I selected internal pull-up. The configuration is shown in the figure:
Next, click on the NVIC tab page to enable the interrupt we configured:
In addition, the priority of preemption should be lowered by one (from 0 to 1, the reason will be explained below).
Configuring Interrupts in the Code
Just add the following code at the end of stm32f4xx_it.c:
/* USER CODE BEGIN 1 */

void HAL_GPIO_EXTI_Callback(uint16_t GPIO_Pin)
{
    if(HAL_GPIO_ReadPin(KEY1_GPIO_Port, KEY1_Pin) == 0)
    {
        HAL_Delay(100);
        if(HAL_GPIO_ReadPin(KEY1_GPIO_Port, KEY1_Pin) == 0)
        {
            HAL_GPIO_TogglePin(LED1_GPIO_Port,LED1_Pin);
        }
    }
}

/* USER CODE END 1 */
The purpose of this code is to rewrite the callback function of the interrupt and add the functionality to toggle the LED using a button. However, there is a pitfall in the HAL_Delay() delay function used here. It is based on the SysTick timer (which generates interrupts at fixed time intervals), so it has its own interrupt priority. As can be seen from the NVIC configuration diagram above, both SysTick and the interrupt we configured have a preemption priority of 0, so SysTick cannot be triggered immediately after an external interrupt is triggered. Therefore, we need to lower the preemption priority of the external interrupt (from 0 to 1).
After compiling and uploading, you can switch the on/off state of the LED by pressing the button.
References and Acknowledgements
- Advanced Part II [Interrupt]
- STM32CubeMX Practical Tutorial (Part 3) - External Interrupts (Interrupt and HAL_Delay Function Pitfalls)
Original: https://wiki-power.com/
This post is protected by CC BY-NC-SA 4.0 agreement, should be reproduced with attribution.This post is translated using ChatGPT, please feedback if any omissions.